How to make a Star Stamp Brush for Procreate
Adding decorative elements like stars to your artwork can bring a touch of magic and whimsy to your digital creations. With Procreate's versatile brush customisation features, you can easily create your own star stamp brush to enhance your illustrations, lettering, and designs and make it super easy to add a touch of sparkle to your designs.
Follow this guide to learn how to turn any of your hand-drawn stars into a responsive Procreate stamp brush!

How to make a star stamp Procreate brush
Step 01:
Create a new square canvas (1080px X 1080px). Select your favourite line brush and create a single illustrated star in the centre of your canvas.
Top Tip: Press and hold once you have drawn your star to activate the shape tools for a more ‘geometric’ star shape
Step 02:
Open the layers menu, tap on the layer where you have drawn your star, and select ‘copy’.

Step 03:
Open the brush library and make a copy of your favorite monoline brush (I recommend using the free monoline brush from the Procreate original brush collection). To make a copy, swipe left on the brush once it is selected and tap ‘duplicate’.
Step 04:
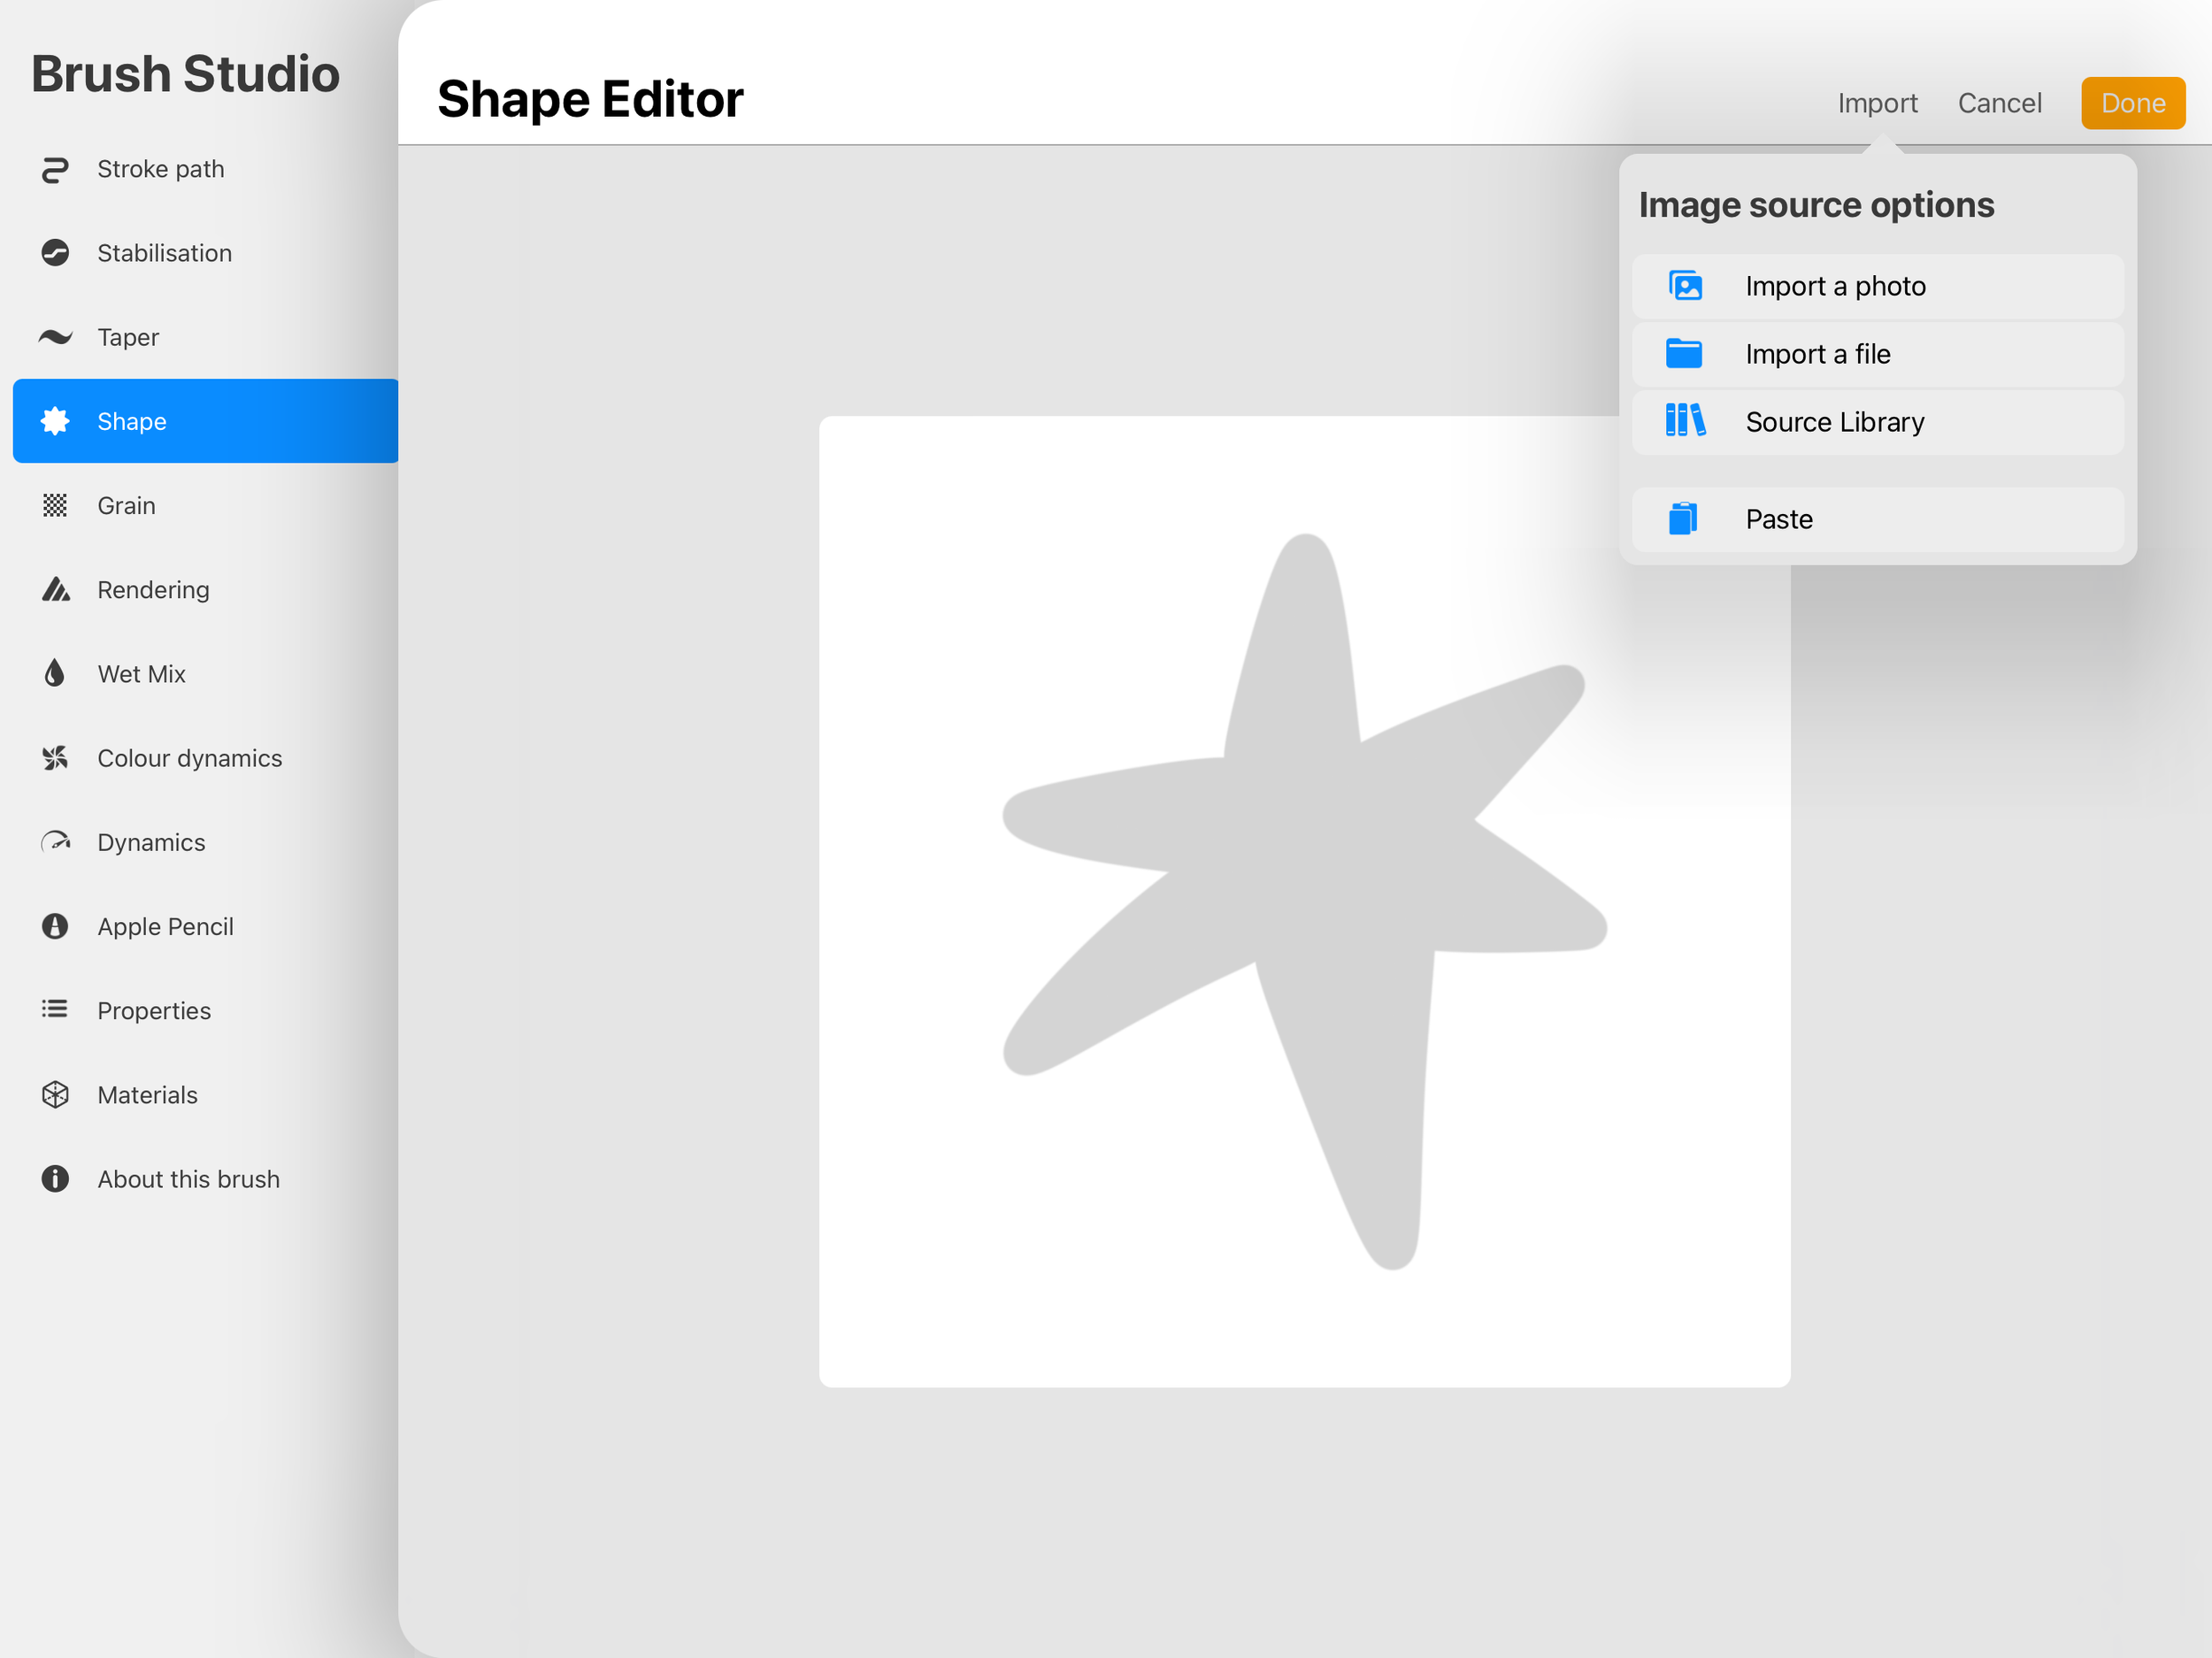
Double-tap the copy of the monoline brush to open the brush settings. Select ‘shape’ on the left-hand side, then tap ‘Edit’ above the shape preview. Tap 'import', and then select 'paste'; this will paste your star illustration from your canvas into the shape editor. Then tap ‘done’.
Step 05:
Under the new shape source preview, toggle the ‘rotation’ bar all the way to the right until it reads ‘follow stroke’; this will ensure that your stars follow the path of the lines you draw when using the brush, if you wish to use them to create a dotted line.
Step 06:
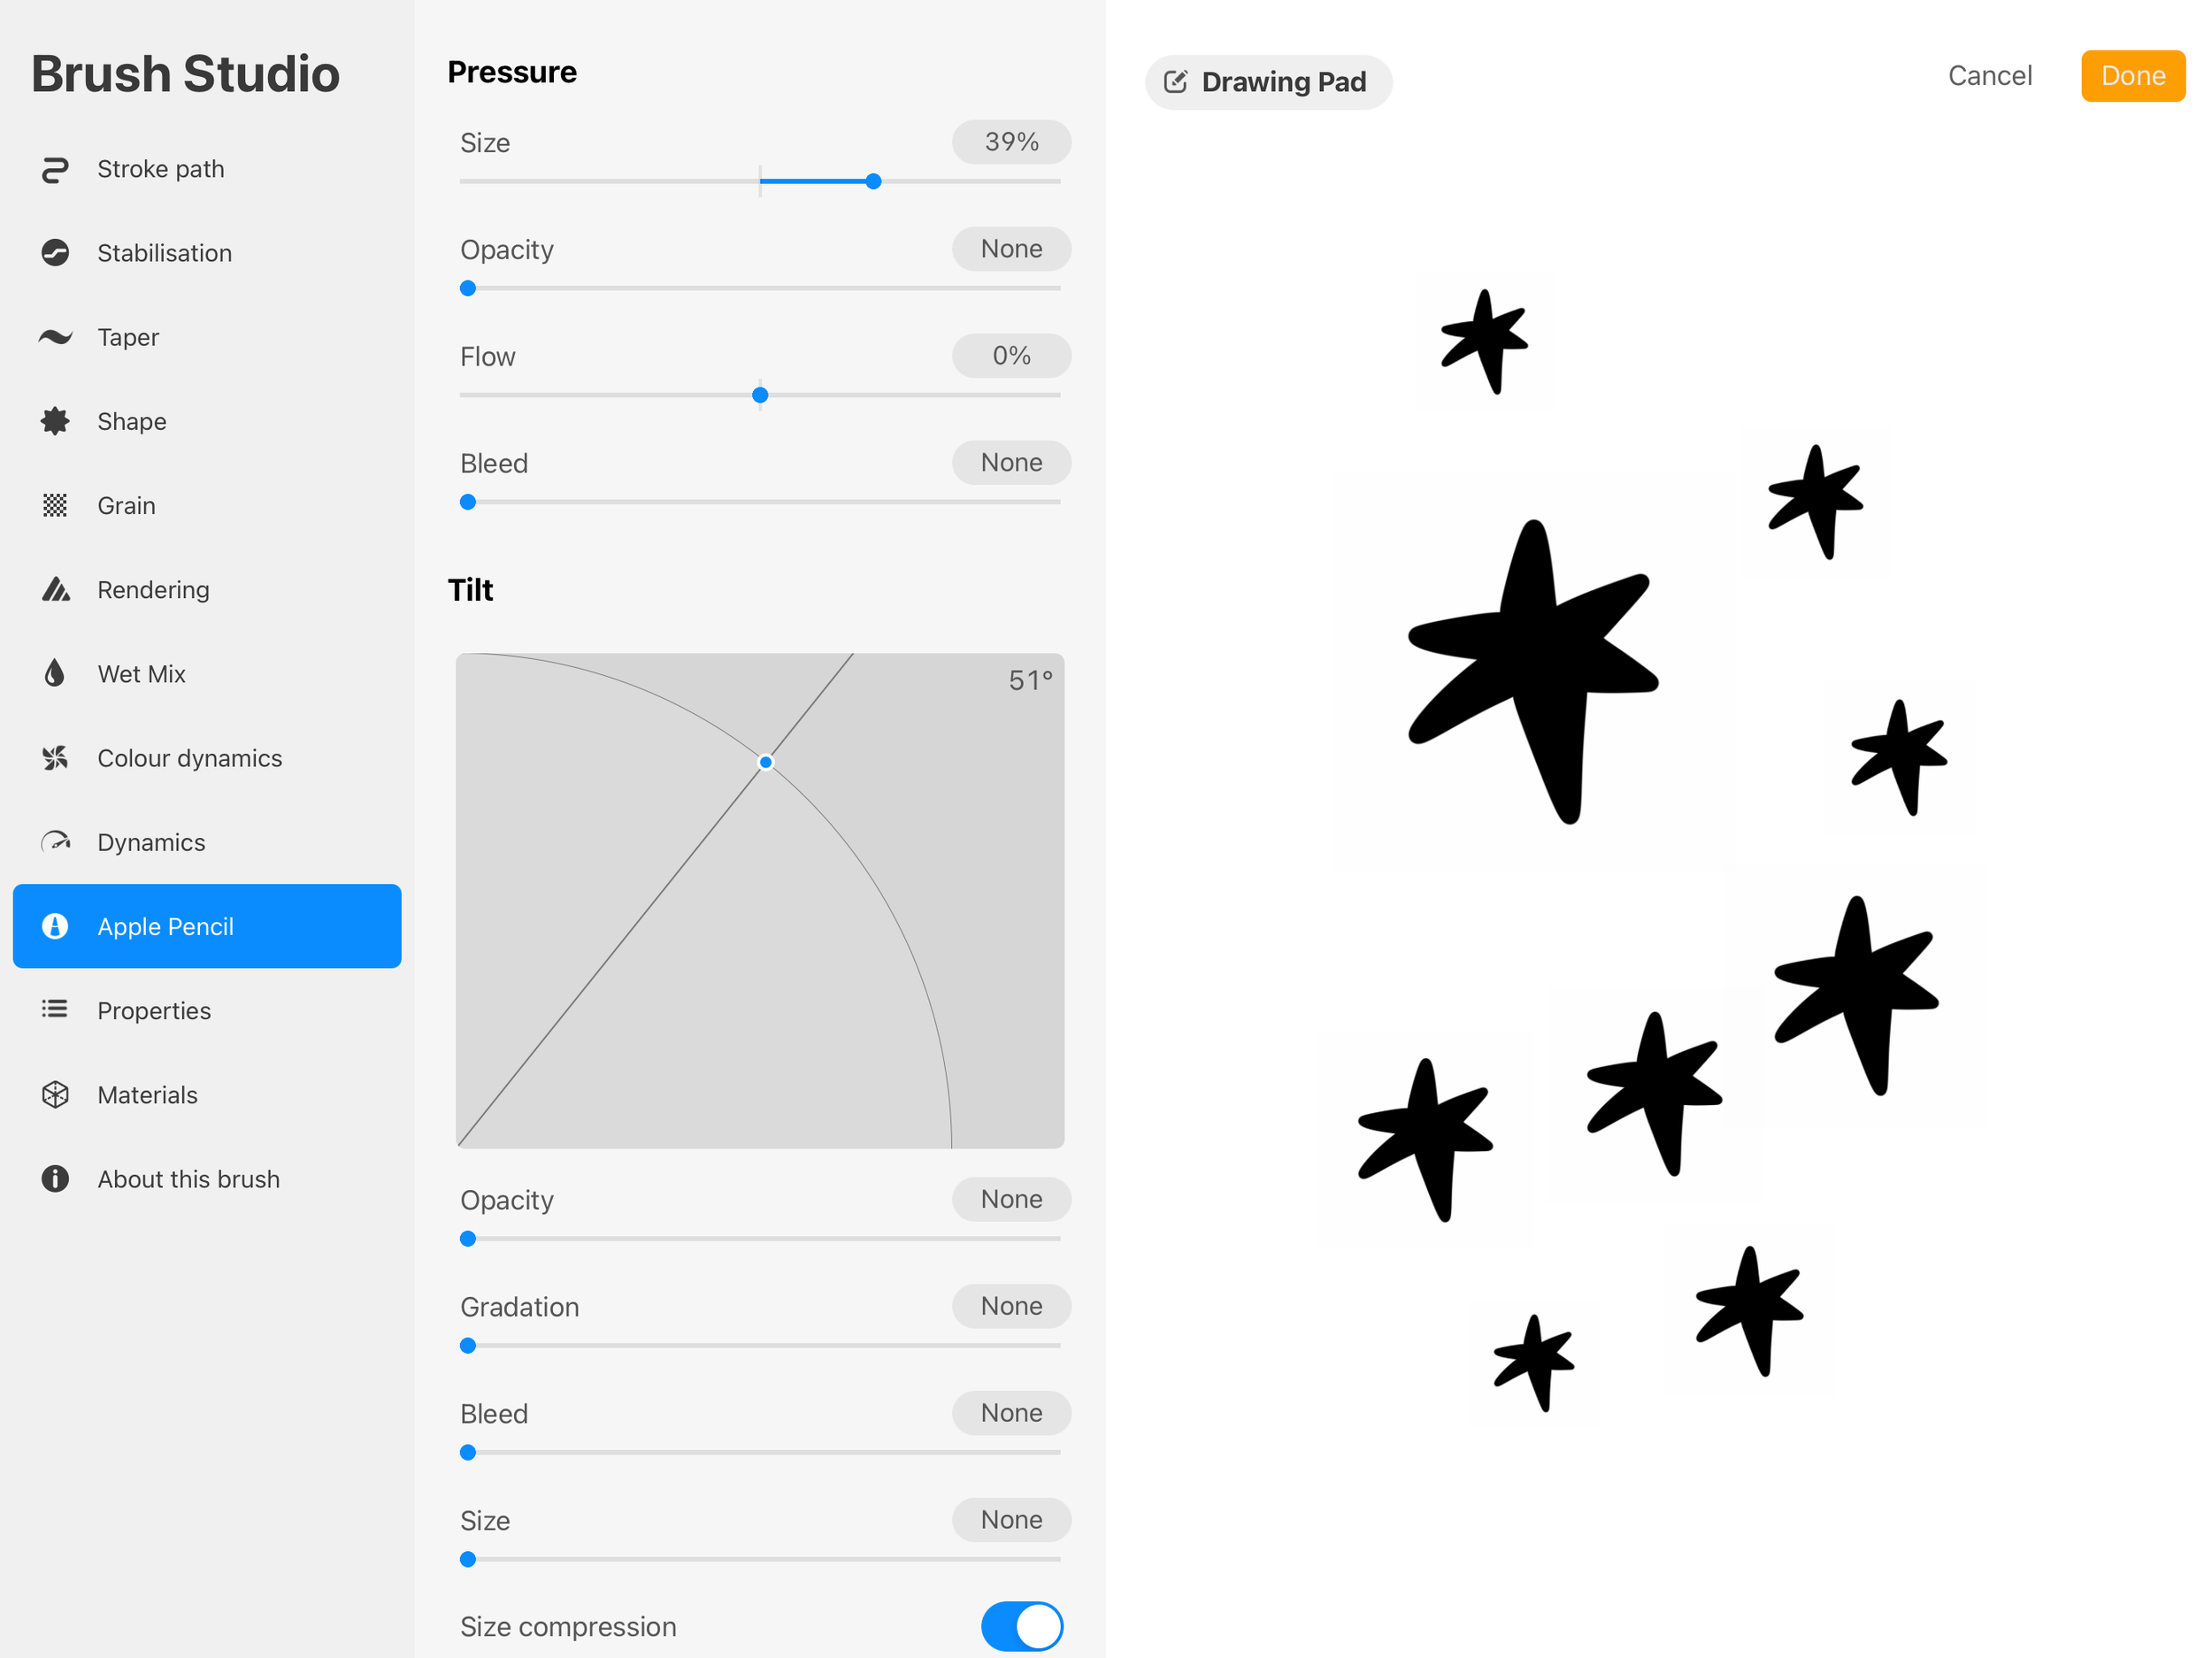
Tap on ‘Apple Pencil’, then slide the ‘Pressure’ property bar to the right (I recommend somewhere between 30-45%) to adjust how much the stamps size will vary depending on the pressure you apply with your pencil - this is great when using this brush as a stamp to add star details so that you can easily create variations in the size of the stars without needing to adjust the size of the brush.
Step 07:
When you are satisfied with your brush's setup, tap on ‘About this brush’ in the bottom left and rename it before tapping ‘Done’ to save your new star stamp brush and all its preferences.

